A single missed smoke detector battery or a slow-draining shower can snowball into a one-star review, a guest injury claim, or a citation from your local code enforcement office. Running a profitable short-term rental means staying ahead of those problems. Not reacting to them after checkout.
Regular property inspections are how serious STR operators protect their income, their guests, and their standing with platforms like Airbnb and Vrbo. This checklist breaks down exactly what to inspect before every turnover, organized room by room so nothing slips through the cracks. Print it, share it with your cleaning team, and use it every single time.
Why STR Inspections Are Non-Negotiable
Inspections do three things at once: they keep guests safe, protect you legally, and preserve the physical condition of your property. Skip them, and you are gambling with all three.
On the safety side, the National Fire Protection Association (NFPA) reports that three out of five home fire deaths occur in properties without working smoke alarms. For a short-term rental with rotating guests who may not know the layout of your home, functional detectors and clear exit paths are not optional. They are life-or-death infrastructure.
On the compliance side, more cities are tightening STR regulations every year. Nashville requires a permit and property inspection before you can legally operate. Denver mandates annual license renewals with safety compliance checks. Austin enforces occupancy limits and fire safety standards through its short-term rental licensing program. If your property fails an inspection, or if you never scheduled one, you risk fines, permit revocation, or forced shutdown.
Then there is the business case. Properties that are consistently maintained earn better reviews, which drives higher occupancy, which increases revenue. A broken cabinet hinge costs $4 to fix proactively. A guest complaint about it costs you a partial refund and a public review that lingers for years. If you want a deeper dive into protecting yourself from liability, read our guide on whether insurance covers Airbnb. You can also see how experienced operators handle property management by reading 10XBNB reviews from actual students.
Exterior Inspection
Start outside. Guests form their first impression before they walk through the door, and exterior hazards are often the ones that trigger municipal code violations.
- Roof and gutters: Look for missing shingles, visible damage, sagging gutters, or standing water. Water intrusion causes mold, a health hazard the EPA flags as a serious indoor air quality concern.
- Walkways and stairs: Check for cracked pavement, uneven steps, loose railings, and tripping hazards. Clear debris from paths.
- Patio and deck: Test railings for stability. Inspect boards for rot, splinters, or loose nails. Ensure outdoor furniture is clean and structurally sound.
- Exterior lighting: Verify that porch lights, pathway lights, and motion-sensor lights all function. Replace burnt bulbs immediately.
- Doors and locks: Confirm the front door deadbolt engages smoothly. Test smart lock batteries or keypad codes. Check sliding door locks and screen door latches.
- Windows: Inspect for cracked panes, broken seals, and functional locks on every ground-floor window.
- Grill and outdoor equipment: Clean the grill grate, check propane levels, and verify ignition. Remove any wasp nests or pest activity from outdoor furniture.
- Landscaping: Trim overhanging branches, mow the lawn, and remove any standing water that attracts mosquitoes.
- Security cameras: If you have exterior cameras (disclosed per Airbnb policy), confirm they are powered on and recording. No cameras should point at private areas like hot tubs.
Take time-stamped photos of the exterior after every inspection. This documentation is your proof of condition if a guest files a damage claim or a neighbor files a complaint.
Living Room and Common Areas
Common areas get the most foot traffic and the most wear. Inspect them with a guest’s eye. Not an owner’s eye.
- Furniture: Sit on every couch and chair. Check for broken springs, wobbly legs, stained cushions, or torn upholstery. Tighten any loose screws on tables and shelves.
- Floors: Look for scratches on hardwood, stains on carpet, cracked tiles, or curling edges on rugs (tripping hazard).
- Walls and ceilings: Scan for scuff marks, nail holes, water stains, or peeling paint. Touch up as needed.
- Electronics: Test the TV, streaming logins, remotes (fresh batteries), and any Bluetooth speakers. Confirm WiFi is working and the password matches what you have in your listing and house rules.
- Lighting: Turn on every lamp, overhead fixture, and dimmer switch. Replace any dead bulbs.
- Thermostat: Verify it responds to adjustments and is set to a comfortable default (68-72°F). Check that the HVAC filter is not clogged.
- Closets and storage: Make sure no personal items, maintenance tools, or previous guest belongings are left behind. Closets should have empty hangers and extra blankets or pillows.
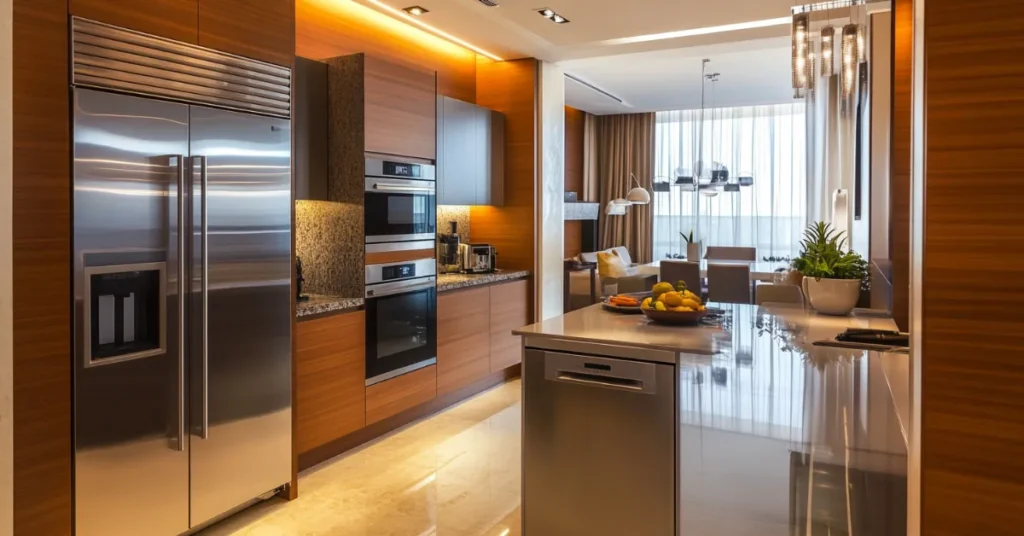
Kitchen Inspection
The kitchen is where most guest complaints originate. A dirty oven, a dull knife set, or a fridge that smells like the last guest’s leftovers will tank your reviews fast.
- Refrigerator: Open it. Check for odors, old food, expired condiments, and proper temperature (below 40°F per FDA food safety guidelines).
- Stove and oven: Turn on every burner. Open the oven and check for grease buildup or food residue. Clean the drip pans.
- Microwave: Run it for 30 seconds. Check the interior for splatter and the door seal for damage.
- Dishwasher: Run an empty cycle. Listen for unusual noises and check for leaks underneath.
- Sink and disposal: Run the faucet in both hot and cold. Check under the sink for leaks, mold, or pest activity. Test the garbage disposal if equipped.
- Countertops and cabinets: Wipe all surfaces. Open every cabinet to confirm dishes, glasses, and cookware are clean, organized, and complete. Replace chipped or cracked items.
- Small appliances: Test the coffee maker, toaster, and any other appliances you advertise in your listing. Descale the coffee maker monthly.
- Supplies: Stock dish soap, sponges, paper towels, trash bags, and at least one roll of aluminum foil and plastic wrap. Guests notice when basics are missing.
Your Airbnb cleaning checklist should align directly with these kitchen inspection items so your turnover team catches the same issues you would.
Bedroom Inspection
Guests spend more time in bedrooms than anywhere else in your property, and bedding quality is one of the most-mentioned factors in five-star reviews.
- Mattress: Check for stains, sagging, and odor. Use a waterproof mattress protector and replace it if discolored or torn. Replace mattresses every 7-8 years or sooner if they show wear.
- Linens: Inspect sheets, pillowcases, and duvet covers for stains, tears, and pilling. White linens make stains easy to spot and bleach. Replace on a set schedule.
- Pillows: Fold each pillow in half, if it does not spring back, replace it. Provide at least two per sleeping position.
- Nightstands and dressers: Open every drawer. Clean inside. Check for previous guest items, dust, or damage.
- Closet: Provide 5-10 empty hangers, an extra blanket, and a luggage rack if space allows.
- Windows: Confirm blackout curtains or shades function properly. Test window locks.
- Outlets and charging: Verify that bedside outlets work. Provide at least one USB charging cable or a multi-port charger.
Bathroom Inspection
Bathrooms are where cleanliness expectations are highest. A single hair on the shower wall or mildew on the grout line can undo everything else you got right.
- Toilet: Flush it. Check for running water, leaks at the base, and loose bolts. Clean under the rim. Stock a plunger in every bathroom, discreetly, but accessibly.
- Shower and tub: Run the water. Check pressure, temperature, and drain speed. Inspect caulking for mold or gaps. The CDC recommends flushing infrequently used water systems to reduce Legionella bacteria risk, if your property sits vacant between bookings, run all faucets for two minutes before guest arrival.
- Sink and vanity: Test the faucet. Check underneath for leaks. Wipe down the mirror and all surfaces.
- Ventilation: Turn on the exhaust fan. If there is no fan, check the window opens. Poor bathroom ventilation breeds mold rapidly.
- Supplies: Stock toilet paper (at least 4 extra rolls), hand soap, shampoo, conditioner, body wash, and a fresh set of towels per guest. Include a bath mat that does not slide.
- Grout and caulk: Inspect every grout line and caulk seam. Discoloration or gaps mean moisture is getting behind your walls. Recaulk at least annually.
Safety and Security Systems
This section is not optional. Safety failures cause injuries, lawsuits, and platform removal. Treat it as the most important part of your inspection.
- Smoke detectors: Press the test button on every unit. Replace batteries every six months regardless of whether they are chirping. The NFPA recommends smoke alarms in every bedroom, outside each sleeping area, and on every level of the home.
- Carbon monoxide detectors: Required by law in most states if you have gas appliances, an attached garage, or a fireplace. Test monthly.
- Fire extinguisher: Verify it is accessible (kitchen and one per floor), charged (check the gauge), and not expired. Replace or service annually.
- First aid kit: Confirm it is stocked with bandages, antiseptic, pain relievers, and emergency contact numbers.
- Emergency exits: Walk every exit path. Remove any obstructions. Verify that all exit doors open easily from the inside without a key.
- Locks: Test every exterior door lock, window lock, and bedroom privacy lock. Replace any lock that sticks, jams, or shows signs of tampering.
- Pool, hot tub, or water features: If applicable, check fencing, gate latches, chemical levels, and anti-entrapment drain covers. Post safety rules and emergency numbers visibly.
- Handrails and stairs: Confirm all handrails are secure. Stair treads should be even and non-slip.
Document every safety item with photos and keep a log with dates. If a guest is ever injured and claims negligence, your inspection records are your primary defense. Our rental arbitrage legal guide covers the regulatory side of this in more detail.
Final Walk-Through Before Guest Arrival
After your cleaning team finishes and your inspection is complete, do one last pass through the property as if you were the guest walking in for the first time.
- Front door: Does the lockbox or smart lock code work on the first try?
- First impression: Does the space smell clean? Is the temperature comfortable? Are lights on or easily findable?
- Welcome materials: Is the house manual visible? Does it include WiFi info, checkout instructions, emergency contacts, and your house rules?
- Overall cleanliness: Run a finger along surfaces, check under beds, and look inside the microwave. These are the spots cleaning crews miss most often.
- Supplies confirmed: Toilet paper, paper towels, trash bags, dish soap, coffee, basic pantry items (if you provide them).
- Photo documentation: Take 10-15 time-stamped photos of the full property in guest-ready condition. Store them by date in a cloud folder.
This final walk-through takes 10-15 minutes and saves you hours of dealing with guest complaints. Make it non-negotiable for every turnover.
Scheduling Inspections and Seasonal Adjustments
How often you inspect depends on your booking volume, property type, and local regulations.
Between every guest: Your turnover team should run through a shortened version of this checklist at every cleaning. Safety items (detectors, locks, fire extinguisher), supplies, and obvious damage should be checked every single time.
Monthly (high season): Do a full property inspection during peak booking months. This includes testing all appliances, checking plumbing, inspecting HVAC filters, and photographing the property condition.
Quarterly (low season): Even when bookings slow down, run a complete inspection. Vacant properties develop issues, pest intrusion, plumbing leaks, HVAC problems, that go unnoticed without regular visits.
Seasonal priorities:
- Spring: HVAC servicing, pest prevention, gutter cleaning, exterior paint touch-ups.
- Summer: AC performance, pool/hot tub maintenance, landscaping, outdoor furniture condition.
- Fall: Heating system check, weatherstripping, roof inspection, leaf removal from gutters and walkways.
- Winter: Pipe insulation, thermostat functionality, ice/snow removal plan, fireplace inspection if applicable.
Build these into your calendar at the start of each year. Properties that follow a scheduled maintenance plan cost 30-40% less in emergency repairs over a five-year period compared to properties managed reactively.
Frequently Asked Questions
What is the 7-day inspection rule for short-term rentals?
There is no universal “7-day rule.” Some municipalities require property owners to investigate or respond to code complaints within seven days. Others require landlords to provide seven days’ notice before entering an occupied rental for inspection. The actual requirement depends entirely on your local jurisdiction. Check your city’s STR ordinance or consult the rental arbitrage legal guide by state for specifics.
How do I pass a city short-term rental inspection?
Most municipal inspections focus on fire safety, occupancy limits, egress, and sanitation. Make sure you have working smoke and carbon monoxide detectors on every floor, a fire extinguisher in the kitchen, clear emergency exits, and no visible health hazards like mold or pest infestations. Nashville, Denver, and Austin all publish their inspection criteria online, review the specific requirements for your city before the inspector arrives.
Should I hire a professional inspector or do it myself?
For your regular turnover inspections, train your cleaning team and do them yourself using this checklist. For annual deep inspections or pre-licensing checks, hiring a certified home inspector ($300-$500) is worth the cost. They catch structural, electrical, and plumbing issues that non-professionals miss. Think of it the way you think about insurance, the cost only seems unnecessary until you need it.
How do I document inspections for legal protection?
Take time-stamped photos at every inspection and store them in a cloud-based folder organized by date. Keep a written log noting what was inspected, what was found, and what was repaired. If a guest files an injury claim or a damage dispute, this documentation is your first line of defense. Platforms like Airbnb also reference host documentation when adjudicating resolution center claims.
What happens if a guest damages something between inspections?
Your pre-arrival and post-checkout photos establish a baseline. Compare them to identify new damage. File a claim through Airbnb’s resolution center within 14 days of checkout (or before the next guest checks in, whichever is sooner). Having a consistent inspection process with photo documentation dramatically increases your chances of a successful claim. Make sure your insurance coverage also accounts for guest-caused damage beyond what platform protection covers.